 We don’t own an ice-cream maker, but I’ve been craving it for oh-so-long. All this while, I refused to make ice-cream/ frozen yoghurt/ sherbet/ sorbet just because I couldn’t bear the thought of not achieving the perfect texture. But I finally gave in because I love frozen yoghurt more than anything. And we don’t get it in tubs here at all. And, the Coco Berry counters are so incredibly miserly about the portions. Anyhow, those are enough reasons. I found this recipe and modified it to make this recipe.
The only berries we get freely are strawberries, the season for which is totally over. So I got Mangoes instead. I’m probably one those extremely rare Indians who won’t kill for Mangoes. But the idea of adding some tang to Mangoes with yoghurt was attractive enough!
Here’s what I used:
3 large mangoes (I needed approx 3 cups of puree) – I could only find the Chausa variety, which is NOwhere near as delicious as Alphonso Mangoes. If you can get your hands on them, please don’t substitute with any other kind!). These should be peeled and pureed.
2 cartons (400 ml each) yoghurt, hung in a cheesecloth overnight
1/2 cup milk
2/3 cup powdered sugar
rind & juice of 2 lemons (Indian small lemons. If you have access to larger ones, then 1 is more than enough!)
Here’s how I made it:
Firstly, I grated the rind off the lemons…

I read somewhere recently that a Microplane Zester is supposed to be used this way, keeping the subject (to be grated) still and on a flat surface while the zester is moved back & forth on it. So I felt like a bit of a dunce for using the exact same way I use a regular grater. But it’s not like I figured out what difference the orientation caused anyway. If you know, do enlighten me!! Here’s another pic:

Then I checked the volume of the hung curd. It had reduced to about 1. 5 cups… So thick and creamy, I wanted to consume it, as is!

I placed it in a bowl with the sugar and lemon zest + juice…

Then I beat the mixture till creamy and well combined…
 Then I added the mango puree…

I beat this well to combine fully…
 Then I added the milk…
 I beat it just enough to combine fully…
 Then I covered it with cling film/ plastic wrap and placed it in the freezer (at the coldest setting possible). Now this is the part which requires patience and commitment (!!!) if you don’t have an ice-cream maker like me.
If you do, then just put this mix in it and follow the manufacturer’s instructions. I think most brands/ makes would have the yoghurt ready in 25-35 mins. If you don’t have one of these, then do what I did.
After 1 hour, pull the bowl out of the freezer and whip it up again. At this point it would have begin to set along the bowl but the centre would still be mushy. Place it back in the freezer. Repeat this every hour, 4 times. After which, leave it to freeze fully for about 5-6 hours.
(Don’t skimp on this step at all, or your yoghurt will lack the creamy texture. Without the periodical whipping, the yoghurt will develop ice crystals which will crunch when you eat it. So I repeat, DO NOT SKIMP on these vital steps. Or, just buy an ice cream maker!!)
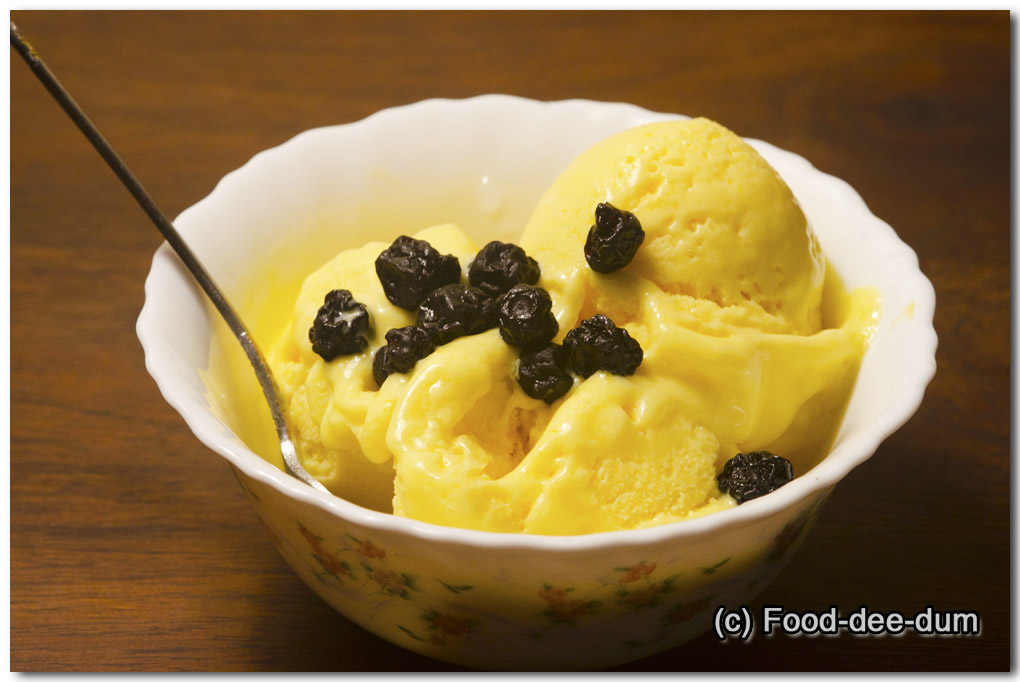
Anyhow, when done, scoop into a bowl and eat as is, or topped with nuts, or other crunchy stuff like crushed cereal/ oatmeal cookies, or fresh berries. I topped mine with the never-ending supply of dried blueberries!!

It’s a little melty, but I have to blame that on the Delhi heat, at this point of the year!!
Anyhow, it’s a little effort (and commitment) intensive, but the final result is more than worth it!!!