Those of you who have been following this blog would know that AK is egg-crazy. Literally. He can consume eggs in any form, any number of times in the day and for days on end! Which means that the usual fried egg-omelette-scrambled egg gets old pretty quickly!
Another type of egg recipe, that is good for more than breakfast, is egg curry. But I’ve never found it very exciting. I see boiled eggs as breakfast food, to be had simply with salt and pepper. Dunking them in curry has never quite appealed to me. But a version of this “curry” that my mom used to make occured to me yesterday. And I remember liking it.
She would cut and cook masala – onions, tomatoes, green chillies, cilantro – add some spices, make indentations in it and crack eggs into the indentations. Then she would cover and cook, without stirring, till the eggs were done. We would have this for lunch often, and it goes equally well with toast, paranthas and rice. She told me that she learned it from a Parsi friend, who would make this dish with the variation that it would be baked once the eggs were cracked rather than finishing it up on the stove. I have been wanting to try the oven/ baked version for a while.
Even though I have had a lot Parsi food at my parents friends’ homes, and am a huge fan, breakfast dishes just hadn’t come up. I searched the www for the recipe but could only come up with multiple versions of Akuri and this eggy-potatoey-gem. And of course the usual Dhansak, Sali Boti and Patrani Machhi. So using my own judgement for ingredients and masalas, I tried out the recipe yesterday. (Only belatedly realising that I could have just called and asked for the recipe!)
But never fear. It was a big hit.
Here’s what I used for 6 individual servings (good for 3 people):
6 eggs
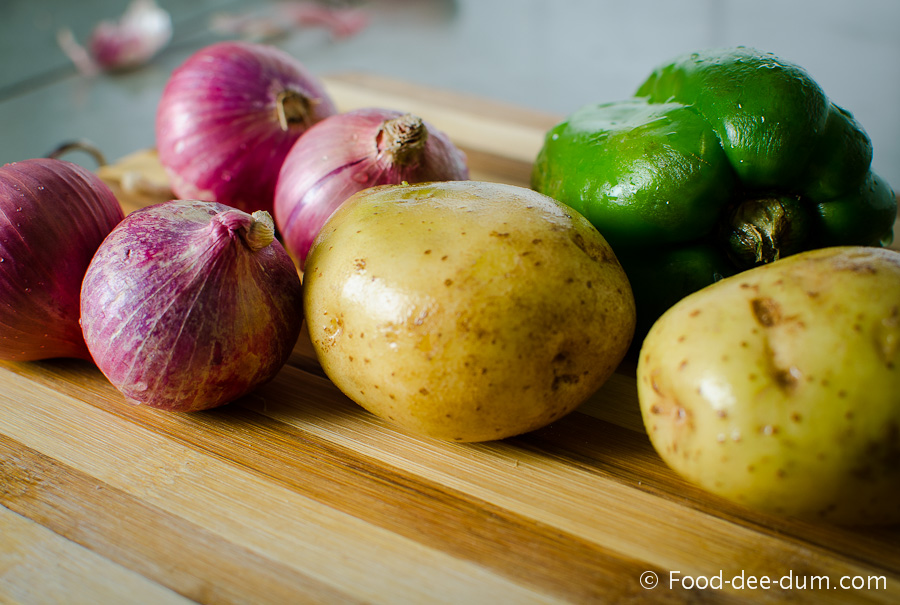
2 medium potatoes
1 carrot
1/2 green pepper/ capsicum
4 small onions (I was at the end of my veggie stock, but you can use 2 medium ones)
5 small tomatoes (same as above – you can use 2-3 medium ones)
3-4 cloves garlic
3 green chillies
3/4 tsp salt
1/2 tsp ground black pepper
1/2 tsp red chilli powder
1/2 tsp paprika
1/2 tsp sugar (you can do without but AK doesn’t like the tangy tomato flavour so I added sugar to negate that)
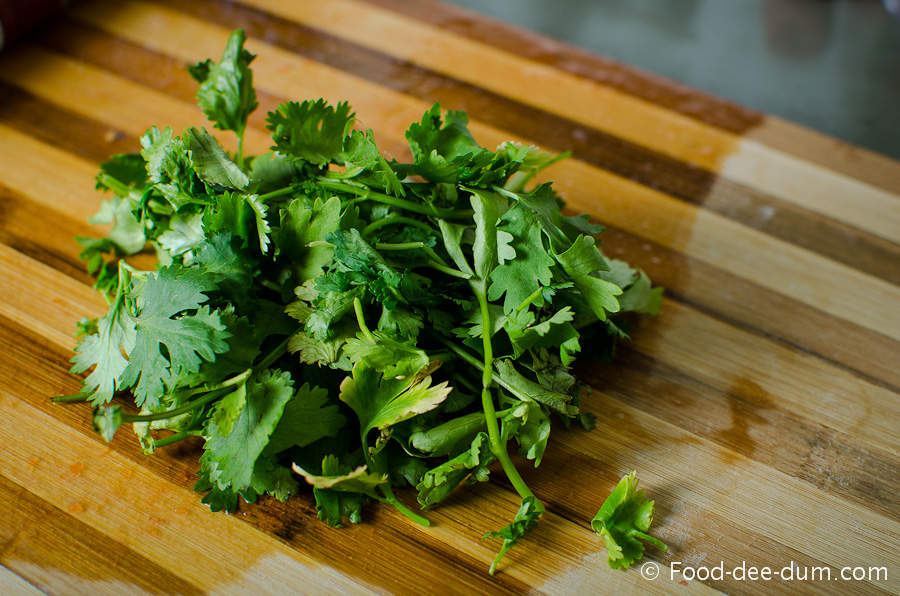
Handful of dhaniya (cilantro)
2 tbsp vegetable oil, plus more to grease ramekins
Here’s how I made them:
Turning on my oven to 200 C to pre-heat, I began putting the ingredients together.
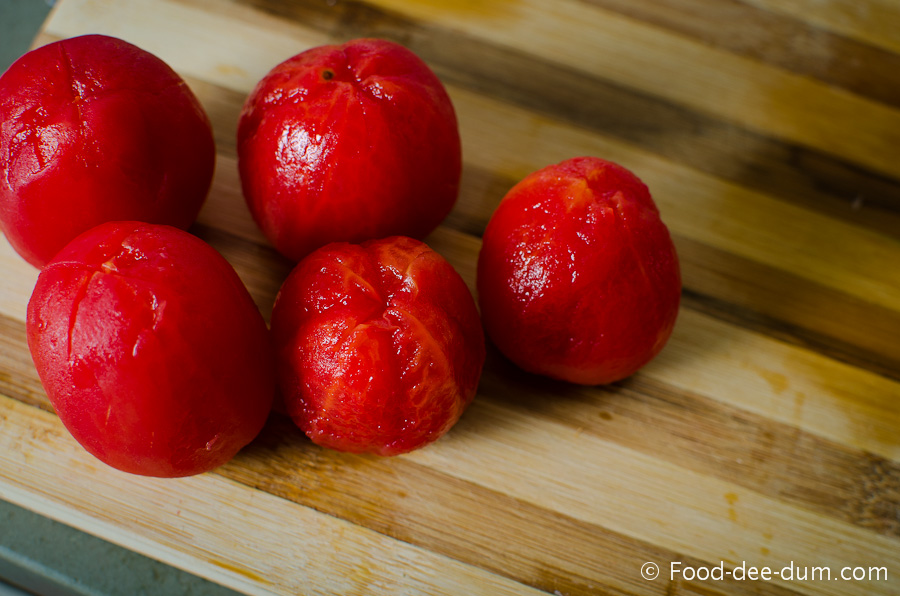
First I blanched the tomatoes. I made shallow cross cuts on their bottom and dunked them into boiling water – turned off the heat – and let them blanch for 15 minutes.


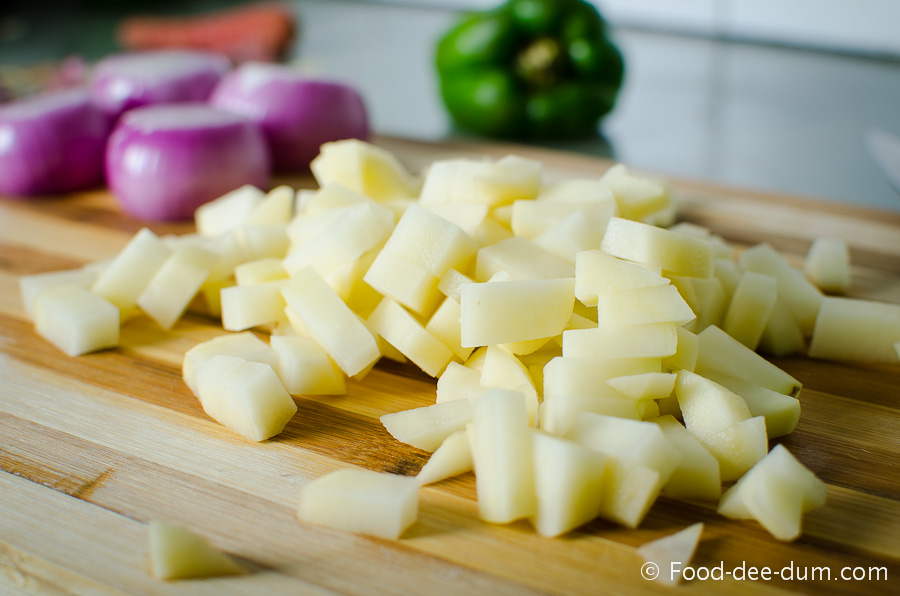
While they were in the water, I peeled and diced the potatoes.
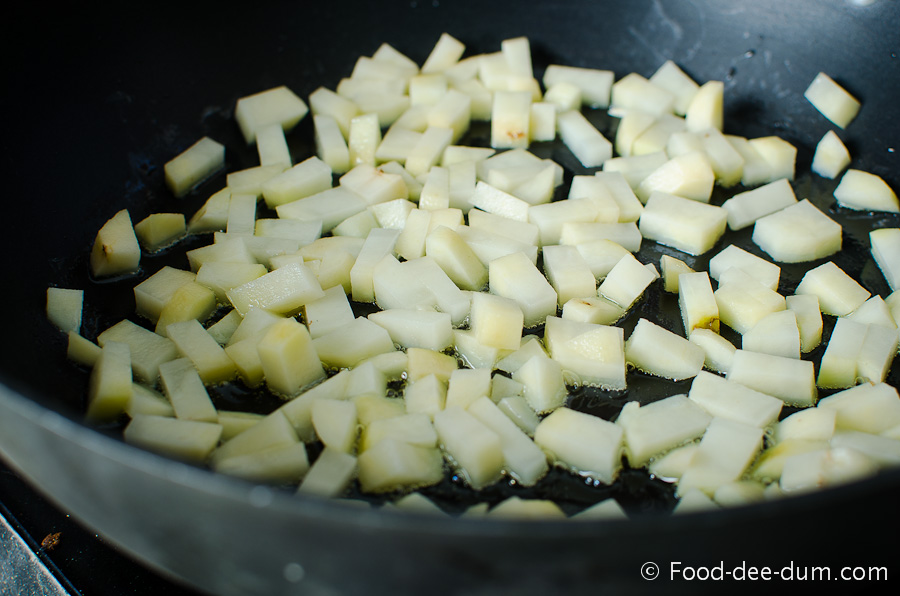
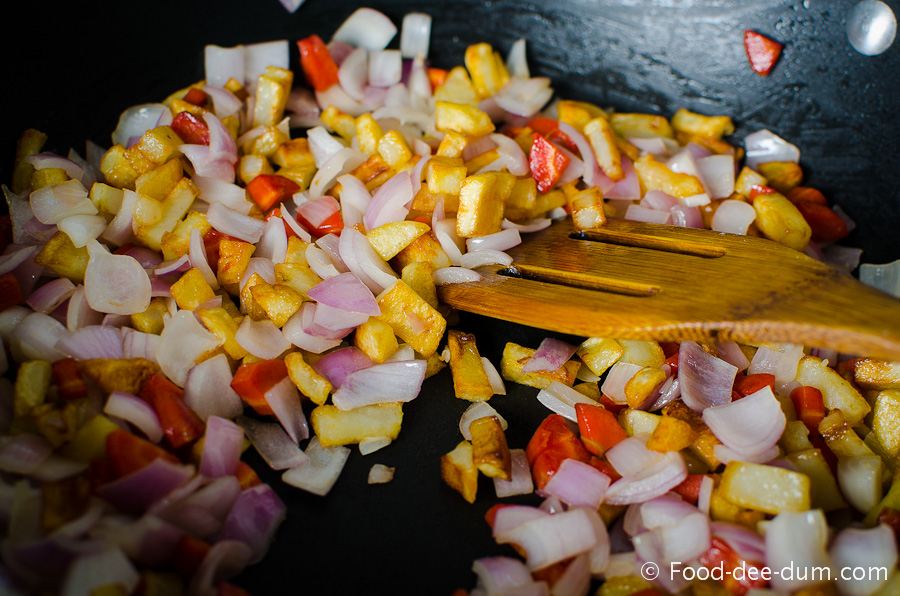
Heating the oil in a large skillet/ frying pan on high until it shimmered, I added the potatoes in a single layer. I picked a large pan because I wanted the potatoes to brown and single layer seemed the way to get there.
While the potatoes were frying (I only stirred them around occasionally, making sure I put them back in one layer), I peeled and diced the rest – the carrots, onions, green pepper.

When the potatoes browned, about 7-8 minutes, I added the carrots and fried for 2-3 minutes till they also browned slightly.

I added the onions and fried until soft and translucent – about 1-2 minutes.
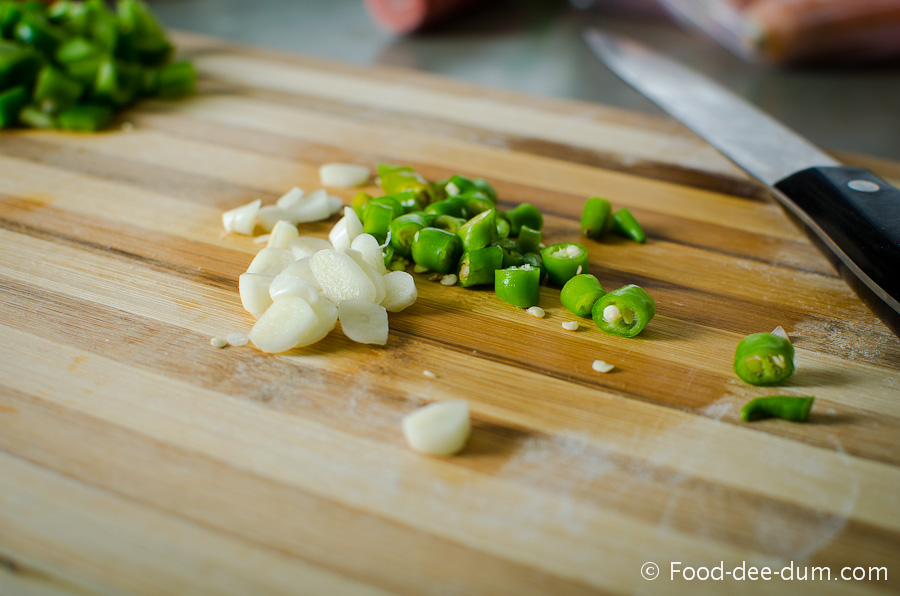
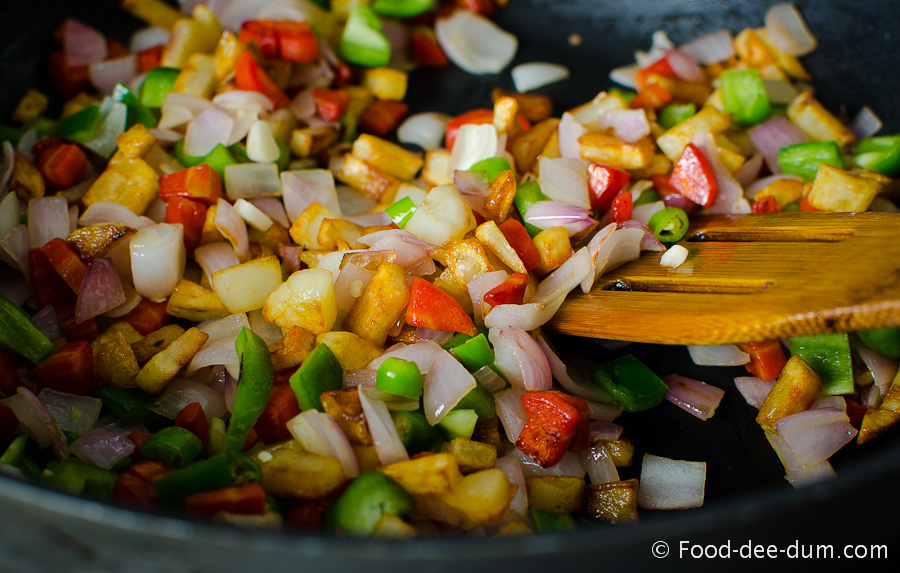
I decided on the garlic and green chillies impulsively and chopped them up. I threw them in to the pan along with the green peppers and fried for another minute.
Sometime during all this chopping & frying, I managed to peel and chop the tomatoes. Thanks to the blanching, the peels came off easily when I pulled them from the cross-slit. They were very mushy and watery when I was done chopping.

Adding the tomatoes to the pan, I tossed in the salt, pepper, red chilli powder, paprika and sugar and mixed it all up to combine. Lowering the heat to medium, I let the mixture cook for 2-3 minutes until the tomatoes were broken up completely and combined well with the rest of the vegetables.
Chopping a handful of cilantro, I added that to the pan too. Giving everything a final mix, I checked the salt and turned off the stove.

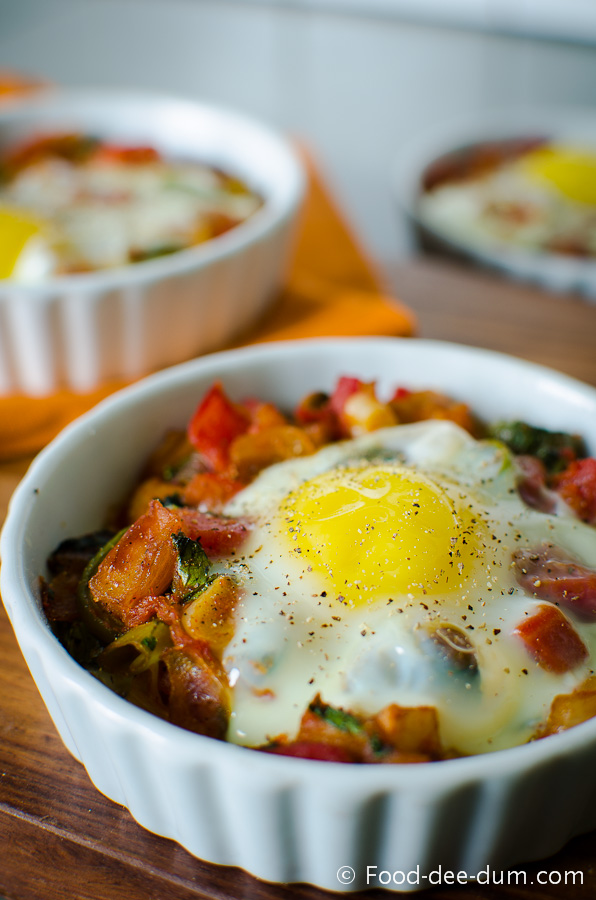
Here’s the point in time when I seriously wished I had gorgeous mini Le Creuset oven proof iron skillets. It changes the whole look and, therefore, the taste! But fear not. I made do with ceramic ramekins. I greased them with a little oil and spooned in the vegetable mix, trying to divide as equally as I could.
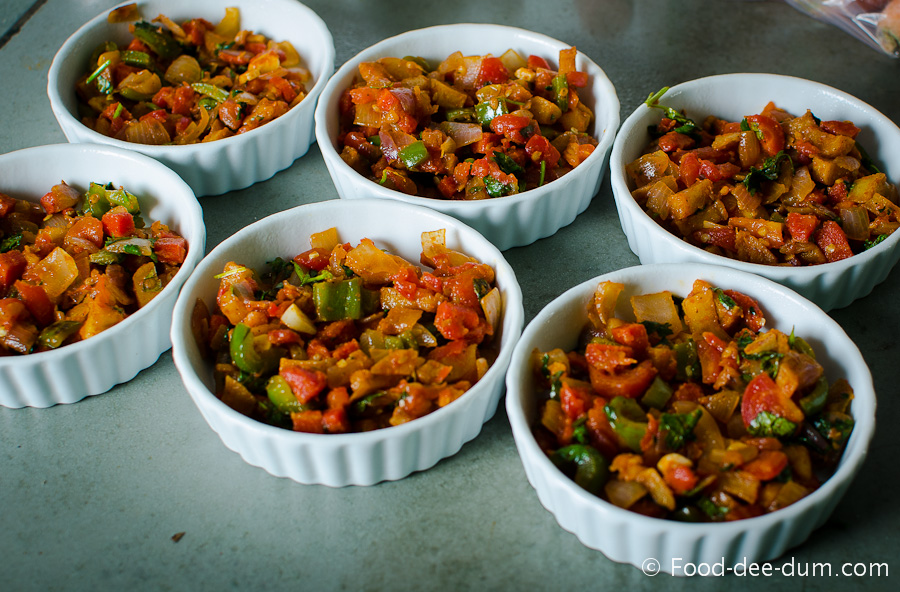
Then I cracked an egg into each of them.

I placed the ramekins on a 10×15 cookie sheet (for stability and ease of handling rather than even cooking) and put them in the oven until the whites were set but the yellow still soft – about 15-20 minutes. (Note on the timing at the end)*
Turning off the oven, I carefully removed the ramekins using oven mitts (they were very hot and I did not want to burn my hands or drop any of them) and sprinkled a little salt and freshly cracked black pepper on top to finish. You can add some chives/ parsley/ onion greens too. I just didn’t have any at the time.
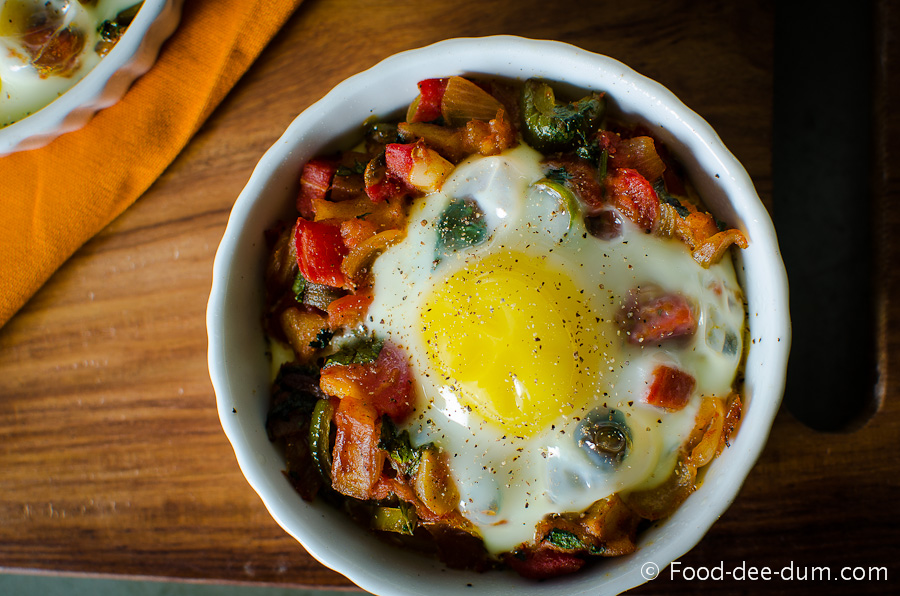
I poked the yellow to let it run out!

We had these with toast and enjoyed dipping it into the soft yellow! I know it sounds like a lot of prep but I promise it will be a great change from the usual egg recipes and you will not be disappointed! I wasn’t and I’m a picky egg eater…
Notes:
- My ramekins were 180 ml/ 6 oz capacity. That is just right for this recipe, but mine are the shallow flan kind rather than the deeper one. I feel those would work better because, as you can see, the egg didn’t cover all the veggies and sort of settled somewhere in the middle.
- The reason oven proof skillets are better is because the veggies can be cooked in them and egg cracked on top without spooning everything into a room temperature bowl and wasting time arranging it all. And it looks prettier.
- You can even make these in a muffin pan – but I would advise using muffin liners so you can lift the whole thing out instead of inverting it or trying to lift it out messily.
- Baking time – I researched a lot of baked egg recipes and the timing varied from 10-20 minutes. I ended up baking mine for 21 minutes but I should have left it at 18. I love runny yellow but can’t stand runny white. So I messed that up a little – the yellow was only semi-soft. Lesson learned – my oven works perfectly at 18-19 minutes. You might need to watch yours after about 12-13 minutes to see how you like it.
- This recipe is not conducive to refrigeration. I refrigerated the one leftover – in the ramekin, covered with foil – but the yellow solidified in an unappetising way!