 Banoffee is my favourite dessert of all time. Over the years, I’ve gotten many other people hooked on to it, including AK, our friend G, my mom-in-law and some friends in Goa & Bombay who can’t bear to visit Delhi without getting a slice at Big Chill.
But all those living in Delhi will be aware of the fact that Big Chill prices are steadily rising and the thickness of the slice they serve is steadily diminishing! So I decided to make it at home.
I’ve tried it once before, but I wasn’t happy with it. And the fact that I’ve idolised Banoffee for so many years always deterred me from trying, just in case I didn’t measure up. As many times as AK has implored me to make it at home, I’ve always found a lame excuse to get out of it!
Anyhow, I assume you have figured out the obvious connotation of Banoffee – bananas + toffee. To be very specific, it consists of 4 layers – 1) cookie base, 2) toffee, 3) bananas & 4) whipped cream. Just thinking about it takes me to heaven and back!There are various recipes floating around on the net. Most of them are variations of this one (quick one by Nestle) and this one (Oprah). Earlier, I tried the quick one and it wasn’t a patch on the real thing. Additionally, I’ve never had any luck with whipped cream. But it worked out well this time.
This is what I used:
200 gm Digestive Biscuits (well I usually use them but my local grocer only had 5-grain today and assured me they’re just as good! End result was just fine. You can use any multi-grain/ hi-fibre biscuits)
4 tbsp melted butter
1 can (400 gm) Nestle condensed milk
3 bananas
1 carton (200 ml) whipping cream – any cream that has at least 35-40% fat content
2 tbsp powdered sugar
½ tsp vanilla essence
1 tsp cocoa powder
½ tsp instant coffee powder
Here’s how I made it:
Firstly, I placed the biscuits in the mixie and ground them to a fine powder. You can even place them in a Ziploc/ plastic bag and smash them up with a rolling pin. I was going to attend a wedding and was in a bit of a hurry!
This is what happens:
Next, I emptied the crumbs out into an 8” springform tin (one with a remove-able bottom). You can also use a pie tin (also remove-able bottom) or even a round glass dish. In this case, you won’t be able to take the whole out of the dish but slice and serve directly from it.
I added in the melted butter and mixed it in to the crumbs.
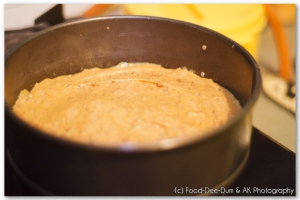
Then I pressed down on the mixture with the back of a spoon so it made a (more-or-less) even base.
(Ideally, at this point, I should have stuck it into a pre-heated oven – 200 C – for about 15 mins, allowed it to cool & THEN stick it in the fridge to chill and set. But I skipped right to the fridge bit. I was in a hurry..!). This needs to remain in the fridge while you make the toffee.
Now for the toffee..! This might sound weird (as it did to me when my Dad’s friend Youhan told me that this was the correct way to prepare this part of the dessert. And he also told me that Big Chill’s banoffee is “average”. So you might see why I didn’t take him seriously – even though he is the most fantastic cook in the world). But I have to agree it’s way better than what I did last time!
The oven should be pre-heated to 200 C/ approx 390 F.
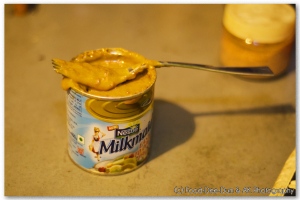
I took the can of Milkmaid. Or rather, AK held the can and took a photo!
I partially opened the can of condensed milk and then pressed down the top again. I then placed it in my loaf tin.
You can use any roasting tin/ cake tin of approximately this size. I then poured boiling water in the loaf tin so that ¾ of the Milkmaid can was immersed in hot water.
Then I put it in the oven for 2 hours. Yes TWO HOURS!! Make sure you handle the tin with oven mitts/ pot holder because it is VERY hot.
You need to make sure you check the water level every half hour and top it up to maintain that level, else the condensed milk will stick to the can and maybe burn a little. As long as you keep an eye on the water level, you should be fine. Plus, using a fork, try and whisk the condensed milk every half hour. I stepped out for some errands and only returned after 1.5 hours (blame it on the traffic) to find the water level severely depleted and a little condensed milk sticking nastily to the can. Ugh.
(Make sure you use oven mitts while handling the loaf tin and the Milkmaid can. It is extremely hot).
Anyhow, this is what mine looks like after the two hours. All caramelly (yes I know that is not a word) and irresistible! Notice the little specks of stuff? Yeah I could have avoided them by maintaining the water level and whisking at periodic intervals.(PS – this photo stands out like SORE thumb cos I took it instead of AK!)
I poured this yummy stuff all over the cookie base and tried to press it down and spread it to make it an even layer. But it doesn’t matter because this dessert is not about getting the layers to be even, really.
There are no photos of me pouring and levelling because I was concentrating on smacking AK’s hand away every time he tried to sneak a bite!
I allowed this to cool properly before placing in the fridge, else there would be condensation and there would be water in my toffee (or the dulce de leche as this caramelised condensed milk concoction is called). I left it overnight and did the rest the next day! But you can move to the next step as soon as the toffee has cooled to room temperature.
At this point, I must mention that dulce de leche (updated method here) is very versatile and can be used as a topping on ice-cream. Or you can mix some chopped nuts into it and set it on a tray – cut them up into squares/bars when cooled. Or you can use it as a topping on muffins, or even toast. And so much more!
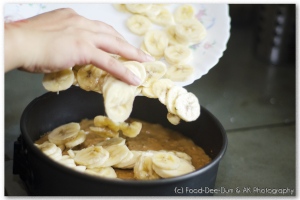
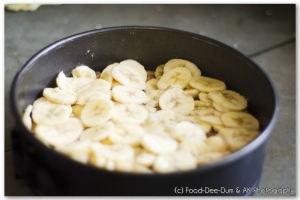
Next, I sliced up 3 bananas. Once again, there is no need to get the slices to look even. They’re going to be hidden under the cream anyway.
I arranged these on the toffee and put it in the fridge while I got the cream ready.
So for the whipped cream (I have always failed miserably on prior occasions), I read up a lot online to get tips on getting it right. The only solution is to find cream that has minimum 35-40% fat content. The usual Amul, Gopala, Vijaya etc seem to have only 25%.This is what I used.
If you use Full Cream Milk at home, then the malai from that should also work. I use toned, so that doesn’t work at all. Next, make sure the bowl and beater you use are clean, stainless steel and have been placed in the freezer for 15 minutes prior to beating.
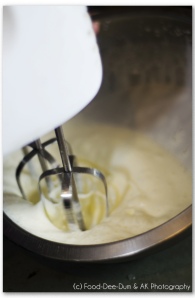
So I poured this whipping cream (it was so runny and liquid-y that I thought that I had a bad batch!) into my chilled bowl and began to beat it with the beater.
Nothing seemed to happen for 2 minutes. I PANICKED. I yelled out to AK to get me a bowl with ice in it. I placed my cream bowl over the ice and beat again. After another minute or so, the cream miraculously started thickening! I felt the blood rush into my face again when I saw that. I have never ever felt a relief so great!
So when the cream got nice and thick (i.e. holds it’s shape when you lift the beater), I added 2 tbsp of powdered sugar and ½ tsp vanilla essence.
After that I just mixed it up for a few secs. No more “beating” at this point.
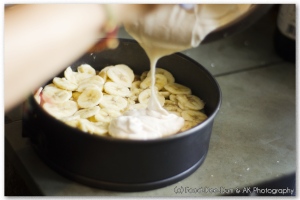
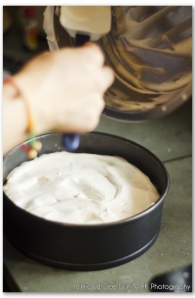
I then poured the cream over the banana layer.
I spread it (sort of) evenly!
Then I took a tsp each of cocoa powder and coffee.
And dusted them over the cream. (Dusting = sprinkle using a small strainer/ chhanni. It’s impossible to sprinkle evenly and finely with your fingers!)
On retrospect, I could have done with ½ tsp of coffee or even none at all. It made the cream look TOO brown. I put it back in the fridge until ready to serve. (Alternatively, you can use chocolate curls/ sprinkles/ vermicilli – anything that’s not chunky).
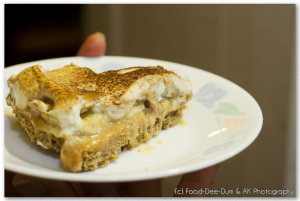
When ready to serve, I ran a knife between the pie and the tin to loosen it. Removed the sides of the tin. (Obviously skip this step if you are serving directly from the glass dish you made it in). Then I sliced it up so we could dig in.
And it was U.N.B.E.L.I.E.V.A.B.L.E
I would make a WHOLE pie EVERYDAY if I wanted to expand to the size of a boulder!!
(PS – for those who don’t have an oven, you can make this too. Just follow the variations below:
- Chill the biscuit base (without baking it) – I did it and it didn’t do too much harm.
- For the dulce de leche, follow the same concept as above. Except place the Milkmaid can in a non-stick saucepan. Pour boiling water to immerse the can ¾ of the way. Simmer for 2 hours. Keep topping the water level. I think that on the stove it takes closer to 3 hours though, so be prepared for a little extra patience!!!)


