 We had a bit of a gas issue AGAIN! So as soon as we gota new cylinder, we decided to celebrate by satiating my 3 day-old craving for Chinese! Two out of the very few Chinese main dishes that AK likes are Chicken in Hot Garlic (yes, I know that’s Indian Chinese) and Kung Pao Chicken! I prefer the latter from the limited choice! So that’s what I decided to make. With my favourite Burned Garlic Noodles. Oh and also steamed baby-corn with roasted Nori.
Here’s what I used for the Chicken:
3 skinless, boneless chicken breasts
For the Marinade:
4-5 garlic cloves
1/2 tsp salt
2 tbsp sugar
2 tbsp soy sauce
1 tbsp cornflour
For the Sauce:
1/4 cup soya
1/4 cup white vinegar
1/2 cup chicken stock (well ideally. I didn’t have any handy so I used 1 cube of Maggi Chicken stock diluted in 1/2 cup water)
2 tbsp sugar
1 tbsp cornflour
Others:
Fistful of Cashew nuts
1 tbsp grated ginger
8 dried red chillies (or less, depending on your spice threshold)
2-3 green/ spring onions (ideally. I didn’t have any so I used 2 regular onions. But I will never make the mistake of leaving out spring onions ever again. Yes, it’s THAT big a deal)
3 tbsp sesame oil (in a pinch, you can use regular vegetable oil too)
Here’s how I made it:
Firstly, I washed & cut the chicken into 1″ cubes.Excuse the icky plastic plate. I really need to get a hold of better preparatory dishes/ utensils.

Then I placed the Marinade ingredients in a bowl and whisked them well together.

I added the cut & drained chicken to the marinade and mixed them well so the chicken was well coated.

I placed the chicken in the fridge for about 20 minutes, while I chopped up stuff. I chopped the onions into big chunks (halve each onion and then cut each half into 5 pieces crosswise), grated the ginger, worked out the noodle steps (detailed later).
I then took my (pretend) wok and heated 2 tbsp of the oil on high heat. When nice and hot, I added the cashews, stirring them occasionally and making sure they didn’t burn.

Can you see some of the cashews turning a beautiful golden colour, at the far end of the pan? We want all the cashews to be evenly golden. They need to be watched very carefully as they go very very quickly from golden to dark brown and burned. When done, I removed them quickly from the pan and kept them aside in a bowl.

Next, in the same hot pan (which has plenty of oil left-over), I added the marinated chicken pieces with the juice.

I cooked this on high heat, stirring frequently, for 5 minutes. This step causes the marinade to make a skin/ coating for the chicken, keeping it juicy inside. It will be done when you can see the chicken whiten-ing under the fried up marinade, like this:

I then removed the chicken from the pan and kept it aside on a plate.
Next, I scraped up as much of the leftover marinade flecks as I could, but gave up after a bit!! Adding the remaining tbsp of oil, I heated it on high. Then added the red chillies (halved) and ginger and fried them for a minute. (After-thought: should have added the ginger AFTER the onions. Then it wouldn’t have come together in clumps.).

Next, I added the onions. (If you’re smarter than I am, and are using spring onions, then reserve about 3 tbsp of the soft green part of the onion for later).I fried them till soft. We don’t want them to wilt and become limp though…

While the onions were frying, I quickly whisked together the sauce ingredients. Yes, I know the photograph shows you the pace of my crazy whisking. I was excited about Kung Pao!!

The onions seemed to be done, so I added the chicken and stirred it around to mix.

Then I added the cashews and gave it another stir.

Then I added the sauce mix and gave it a good stir.

I brought it to a boil, stirring frequently to ensure that the cornflour in the sauce mix didn’t cause any lumps.

Can you see how the sauce thickened and began to coat the chicken? As soon as it boiled, I put the lid on the pan and lowered the heat.

I cooked it on low heat for exactly 10 mins. After which it looked like this.

I sneaked a quick bite of the chicken while AK went off to make us a drink (to make sure it was cooked through, of course. Not because I was hungry or anything).
I transferred the Chicken to a bowl…

All those smarter than me would top this with the reserved greens at this point. It provides SUCH a beautiful contrast to the whole dish, breaking the monotony of the various shades of brown. Anyhow, the not-so-smart Karthasdid no such thing. Rather, they proceeded to take a photo of their drinks before taking a swig. Presenting – Sweet Tea & Bourbon Flavoured Vodka with lime soda (my drink on the left) and AK’s Gin & Tonic on the right…

Moving on.
For the noodles, I used:
1 Packet (200 gm) of dried egg noodles (if you can get your hands on fresh noodles, then that would be perfect)
2 tbsp (yes 2 tbsp) fried – almost burned – garlic
3 dried red chillies
2 onions, sliced thin
2 tbsp sesame oil
2 tbsp vegetable oil
1 tbsp soy sauce
1 tbsp white vinegar
1/2 tsp salt
1/2 tsp Ajinomoto (MSG) – yes I know it’s bad for you and if you feel strongly about it, do feel free to leave it out. Your noodles will still be fantastic!
Here’s how I made them:
I must admit that making Chinese noodles that I’m happy with is quite a challenge for me. They’re always too sticky or there’s too much/ too little of something or the other. But this time, I put together all the snippets and tips that I might have read at some point and it worked out well for me. I’ll list them out for you in a bit.
These are the noodles I used (propped up against AK’s new background!!):

Anyhow, first I put a big pot of water to boil with the salt & 1 tbsp of vegetable oil. Once the water came to a boil, I broke the noodles and added them to the pot. I allowed them to boil and checked on them every 2 minutes so I could ensure that I stopped cooking them when they were al dente (slightly kaccha).
As soon as that happened, I turned off the stove and quickly drained the noodles into a colander. I placed them under running cold water (gentle stream/ pressure so as not to break them) and gently stirred them around with a fork to seperate them. Then I spread them on a tray, as flatly as I could. Adding the remaining 1 tbsp of vegetable oil, once again I forked through the noodles gently to spread the oil and coat the noodles evenly. Then I allowed them to cool fully.

I did all this immediately after marinating the chicken, giving the noodles almost a full half hour to cool. The longer the better.
Next, I placed the fried/ burned garlic (given to me on a silver platter by my darling mummy!) in the mortar…

Then I crushed it coarsely…

Then I split the dried chillies in half…

I heat the sesame oil in the wok till almost smoking and added the broken chillies – fried them for a minute. (In cae you don’t have access to pre-fried garlic, just mince garlic and fry it up at this stage with the chillies.)

Then I added the sliced onions and fried them till soft…

At this point, I should mention that you could add finely sliced carrots/ beans/ capsicum (green peppers) if you so choose. But when there’s burned garlic in the picture, I like to keep the rest simple.
Next comes the garlic, which only needs to be stirred around for a minute.


While this was on, I quickly ran the fork through the noodles again, to ensure that the noodles were well seperated and not sticking together. Then I added the noodles to the pan.

I sprinkled the Ajinomoto, the soya & the vinegar as evenly as I could (to minimise the violent stirring) and stirred it all in as quickly and as non-violently as I could.

I took the noodles off the stove and transferred them to a bowl, ready to be served!

I took 5 minutes to steam some baby corn in the micro and sprinkle with roasted and crumbled Nori.
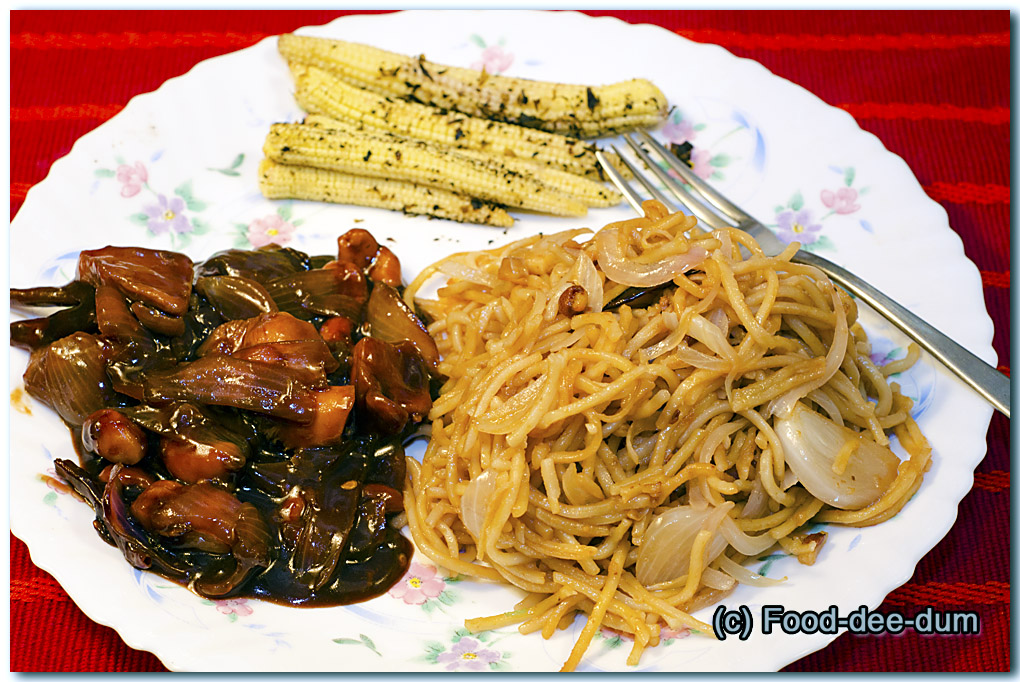
And here we are…

I’d say it was a Thursday night well spent!!
Notes & Tips on the Noodles – make sure of the following:
- Boil them a while in advance so they can cool. Freshly boiled and hot noodles are sure to stick.
- Boil only until al dente.
- Run under cold water and grease with oil after draining the cooking liquid.
- Gently seperate with a fork during cooling and before adding to the pan.